Initial Fedora Server 35 configuration on a Raspberry PI
Ok, you went through the pains of flashing an SD card with Fedora Server 35 raw image. You connected your Raspberry PI to a screen and keyboard, booted and configured your time zone and user at the first time boot prompt. You made your user admin by following the first time boot guide. You are able to login. Now what?
Well first of all, let’s back up a bit. When you write the image to the SD card, there will be a size mismatch: your SD card has for example 64 GB and the Fedora Server 35 raw image has 1.3 GB. By writing this image to your SD card, Fedora Server will only know about the 1.3 GB, it won’t look for the rest so you need to expand your image to fill the whole SD card. Luckily, this is done super easy with Cockpit. Let’s see.
Starting Cockpit
When you login to your Fedora Server 35 Raspberry PI, you always see this short initial message:

It announces that there is a web console accessible on your Raspberry PI (which in my case is located at IP 192.168.68.116 on port 9090). So let’s leave the PI and go to our work laptop. You can disconnect the PI from the monitor and keyboard now and store it in a basket on a shelf. You don’t need access to it anymore because you can SSH into it from any computer in your home network.
Here’s what happens if I enter https://192.168.68.116:9090 in my browser on my main laptop:

Firefox will detect a self signed HTTPS certificate. This is normal. Fedora Server and Cockpit HTTPS communications are not signed by an official authority. But that’s ok because this is our local trusted home network and it’s a trusted Fedora Server install: we installed it ourselves a moment ago. If you want you can obtain a properly signed HTTPS certificate but that’s not for this article.
If we click Advanced and then Accept the Risk and Continue we get the Cockpit log in screen. You will love Cockpit.

Enter your username and password that you configured when you initially booted Fedora Server 35 and here we go:

You should turn on administrative access by clicking the blue button. You will need to enter your password again and that will allow you to access the full UI. Here’s the UI with administrative access enabled:
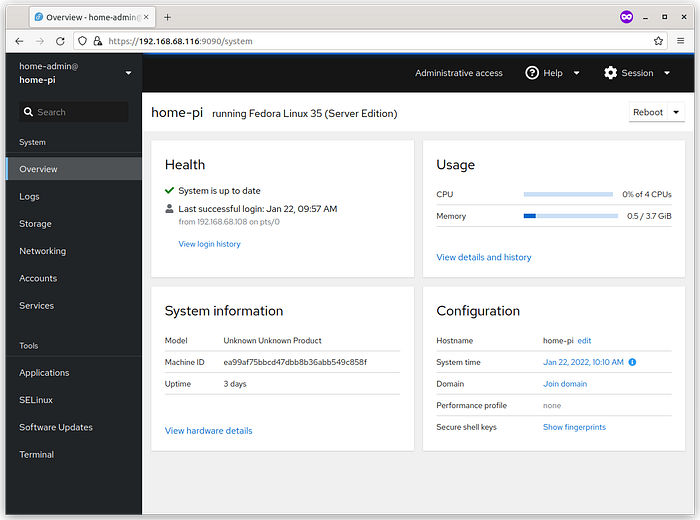
Before we increase our storage space to match the SD card, let’s first set our host name properly. On the lower right card titled Configuration, you have the first item there called Hostname. Initially, the host name will be Fedora or something rather impersonal. So click on the blue edit link beside it and change it to something meaningful to you:
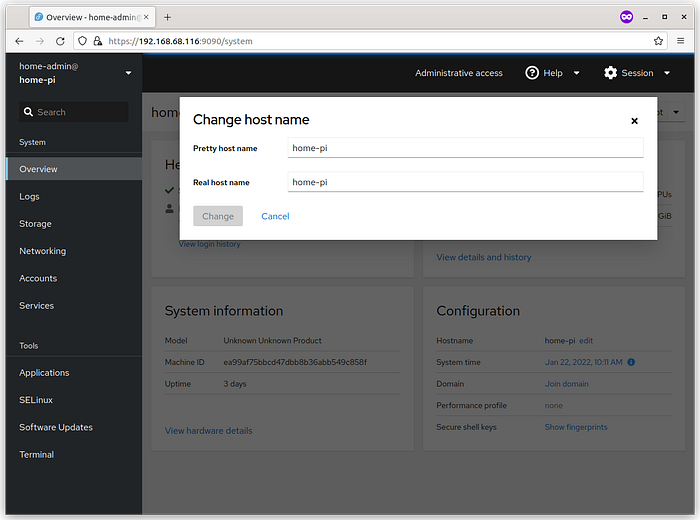
Click on Change and you are done. What this means is that from now on, instead of referring to your Raspberry PI host as 192.168.68.116, you can call it by it’s host name instead (in my case home-pi).
Now let’s do what we wanted to do here all along: increase our storage space to the full extent of the SD card. Click on Storage in the left sidebar:
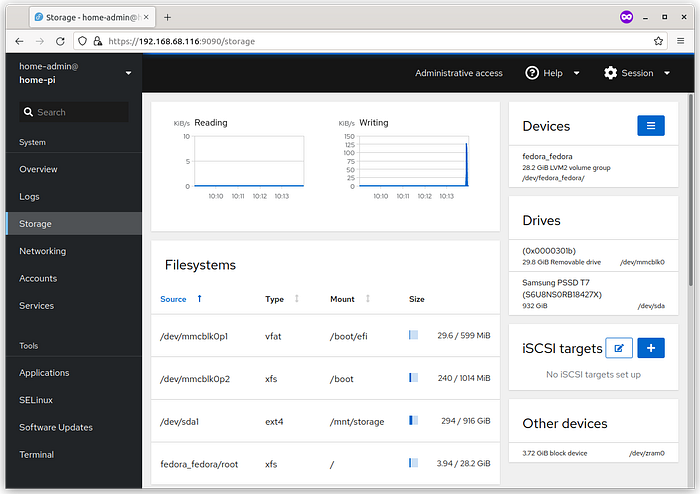
What do we have here? If we look at the Drives card on the middle right, we see an 29.8 GB drive located at /dev/mmcblk0: this is our SD card. We also see a Samsung portable SSD: this is my external drive for my network shares. We will talk about this in a future article but for now, we have a 32 GB SD card in there of which we only use 1.3 GB. Let’s expand it.
Look at the last entry in the main Filesystems card: you will see the root / mount called fedora_fedora/root. Click on it:
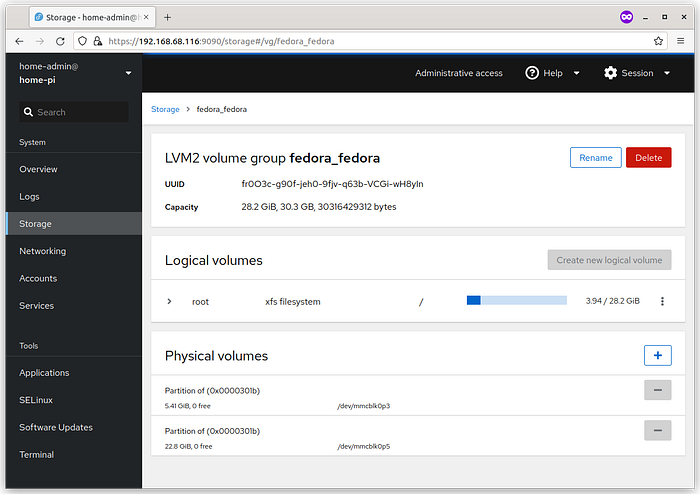
If you look at the Physical volumes card at the bottom of the screen, you will see a difference between the above screenshot and your situation: you don’t have the 22 GB partition. You only have the 5.41 GB one. Ok, let’s create the second one: click on the blue plus button and select the whole unpartitioned space. Now you will see both entries just like in the above screenshot.
Next expand the root logical volume in the middle card:
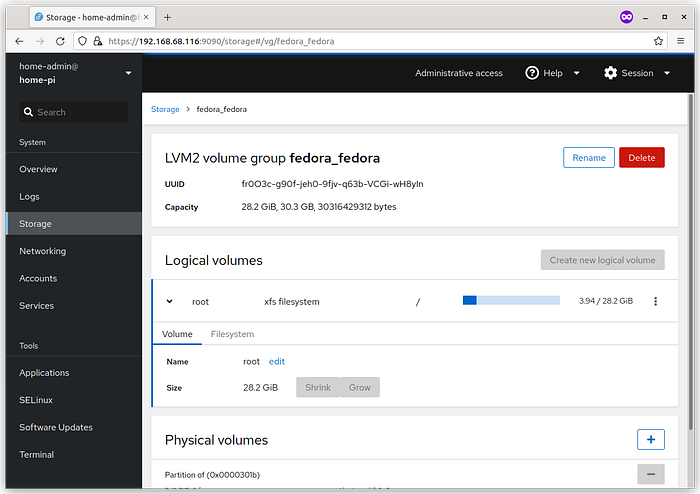
The Grow button will be enabled for you because you will have available extra space. Click on it and expand the volume to its full extent. You are done. If you want you can reboot your Raspberry PI by going to Overview in the left sidebar and clicking reboot, but you don’t have to. Enjoy your full SD card on your newly install Fedora Server 35.
What I like to do next is not required but I usually disable my firewall as I don’t open any external ports on my home network and I also have a guest network on my WiFi for “smart” appliances and other uses. I also disable SE Linux which is a set of security enhancements that ship with the Fedora Server kernel. I don’t really need them and so I just disable it by editing /etc/selinux/config:
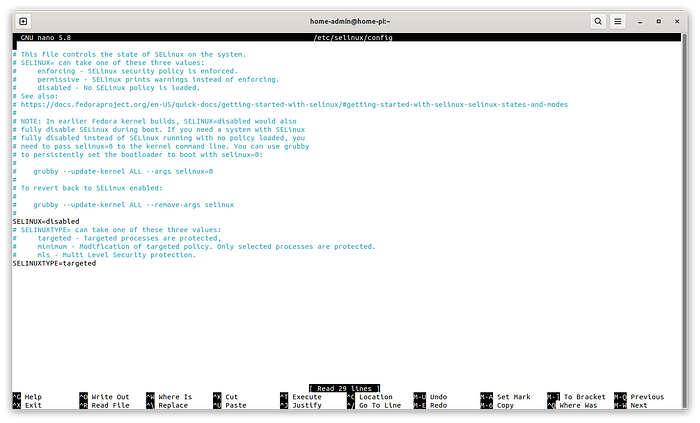
Just put SELINUX=disabled instead of enforcing and you are done. Usually for a home server turning off SE Linux kinda helped a lot. There are lots of advanced scenarios and configurations which will make you scratch your head not knowing what to do or what logs to read and disabling this just makes your life a lot easier. Of course for company servers or production servers or servers with external ports open, for example if you have web apps that you publish on the Internet and host them on your Raspberry PI, you don’t want SE Linux and firewall disabled. But for you private and closed home network I think it’s not really an issue.
You are done! We will talk in future articles about enabling an external SSD to act as a home network storage solution, enabling our Raspberry PI to be a very simple NAS in our network. See you soon!