The MS-DOS disk management revelation: Partition Magic

Before cloud backup and multi-terabyte desktop storage, there was a brief moment in history when disk space was precious. I know I struggled for a while with hard drives of 40 MB and 80 MB, and with sizes measured in tenths of MB, floppy disks were used extensively to back-up applications. This was of course a poor man’s solution because floppy disks were quite unreliable.
When I got my first 140 MB hard drive, everything changed. For the first time I had enough space for applications and back-up, all on the same drive. You cannot imagine the relief felt when I decided floppy disks were no longer needed. But keeping backups and installed software together presented further challenges. What good does it make to have backups if you need to format the drive and lose everything? And yes, formatting the drive was like a cleanup routine in those days. Like good hygiene practice.
So then how do we keep both installed and installable applications on the same drive, at the same time? How do we protect the installable ones while disposing of the others? One solution would be to have two hard drives. But back then nobody had money for that. What we did have though, was the poor man’s alternative: partitions. With a catch. The usual tools we had to create partitions were quite limited. For example, fdisk, the partitioning tool preinstalled with MS-DOS could only create and delete partitions, so if you wanted to edit an already existing partition to make it smaller, you were out of luck.
In fact, partitions were so heavily set in stone, that I would usually create a second partition just in case I ever wanted it. It felt good to just have it in case I needed a bit of reliable backup space, better than floppy disks. After the partitions were made and formatted, the only way to mess with this configuration was to reset everything and start from scratch, losing all files in the process. Until Partition Magic happened.
Reinventing the partitioning process
When I first got my hands on Partition Magic 2, I thought it’s just a better and more pleasant way of doing what I already did so far: create partitions. I had a small glimpse of hope that perhaps someone clever cracked the code needed to change the partition table at will. But of course, that would require more than just editing some binary digits somewhere.
Editing or resizing a partition needs some more clever engineering. If my partition has 200 MB, 50 MB occupied with software and 150 MB free, it will mean I can resize the partition to around 60 MB and remain with 10 MB free. But what I don’t know is where the 50 MB is used physically on the partition. They could be anywhere: at the beginning of the partition, in the middle or at the end. So how do I cut 150 MB out of my partition without affecting by mistake the 50 MB of written data?
MS-DOS did have a tool to help us here: disk defragmentation. The process of defragmentation would arrange all occupied data on a disk or partition at the beginning of its allocated space. It would create a sorted, continuous mass of data, perfect for cutting space out.
So, it looks like the magic was not really needed after all. We had hex disk editors for the partition table, and we had defragmentation tool to make sure all data is in proper order, and the disk prepared for such operations. What we didn’t have was a tool to make it all easier. Enter Partition Magic.
Resizing as easy as entering a number

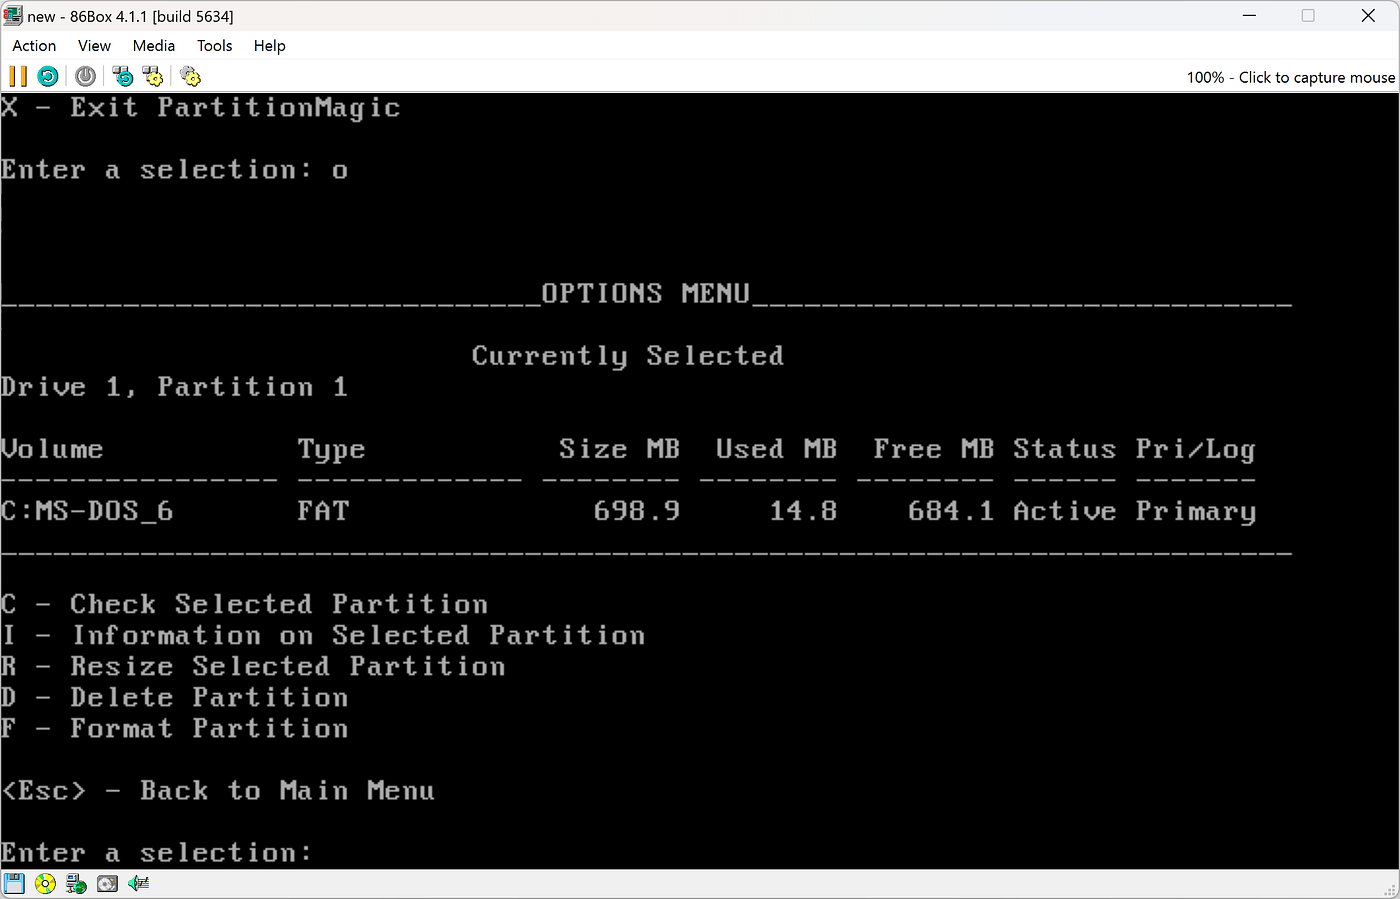
If you followed the screenshots, the revelation was in the second one. Go and take another look at the available options. Yes, there it is, in the third position: “Resize Selected Partition”. Nobody had this before. With two menu selections we could easily change the whole layout of our disk:

In the screenshot above I am bringing my 700 MB partition down to 300 MB. What followed was a quick confirmation, boasting with confidence and avoiding any scary warning:

And then off we go into the resize process, which would take care of disk arrangement, partition table editing, some checks, and done:

We could see the result by choosing “Select a new Partition” and seeing the new configuration with our own eyes:

Now, resizing a partition is nice, but no disk management tool would be complete without allowing us to reclaim the empty space. We can either create one or several new partitions with it or resize the existing one back. Let’s create a new partition. The process follows what we already know with fdisk, only classier:

We are then asked to choose the file system from among more than what fdisk offered:

We are then asked for a drive label and a partition size:

But then here comes another question specific to Partition Magic: where will the new partition be located physically on the disk? This works great if we want to create more than one partition, and we are especially fussy with the disk layout. We may want a partition at the beginning of the disk, and have the new one at the end, and leave room for a future partition in the middle. Not particularly important, nor too useful, but here we are:

Another confirmation without any scary warning, and off we go again:

Note how by default the partition is hidden. This is because Partition Magic was targeting many DOS variations, and some would not support multiple partitions. Some would get so scared about having two partitions that they would crash the whole booting process altogether. But we can turn out new partition visible with a simple command:
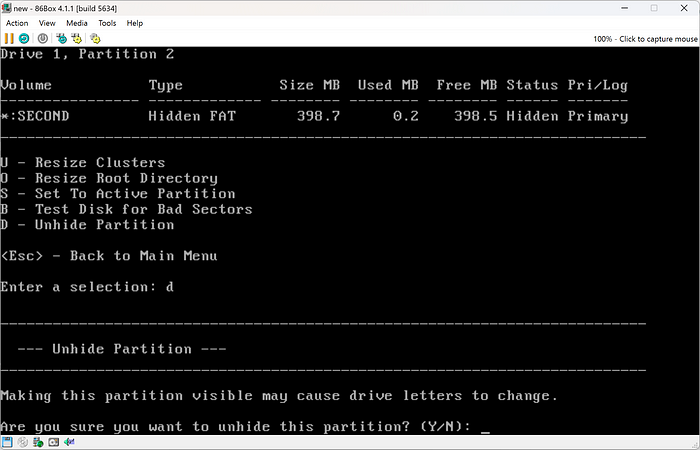
And here it is, usable by MS-DOS:

But times were changing
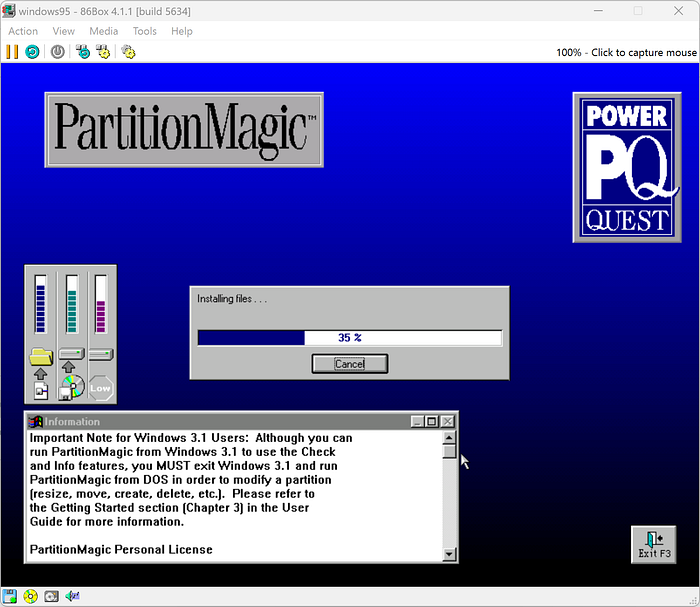
Of course, that was just the MS-DOS interface. Partition Magic 2 offered a fully graphical interface for Windows 95. This meant having all the bells and whistles of modern user interaction: mouse support, drag and drop, a clearer view of the disk layout, and meticulously organized actions:

Even though users back then were quite proficient with navigating textual interfaces and give commands by pressing keys, we cannot argue that the graphical interface shown above looks much better. Note the extensive partition support with helpful color coding, the easy drive selection in the top left panel, and the options button group below. It’s all on a single panel in a single window. It cannot get any easier than this. Of course, partition resizing made clever use of the mouse gestures:

Much easier and definitely more intuitive than entering a numeric size at a text prompt. And yes, we could grab the occupied partition space and move it to the right, effectively moving the whole partition to the end of the disk. Now that’s customer service! But times changed further, and so did the cool Partition Magic. Version 4 brought even more fancy graphics and increased disk handling sophistication.
Version 4 and beyond

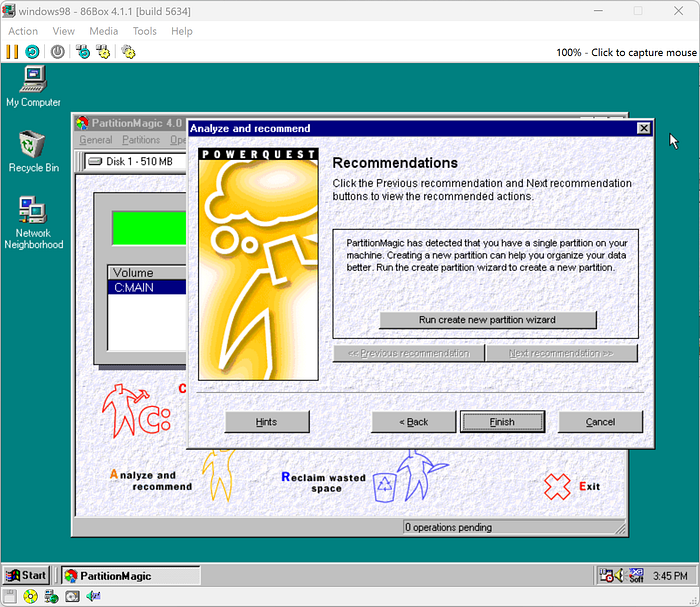
With Windows 98 and the Active Desktop craze, developers started even wilder experiments, creating user interfaces resembling web pages. Look at that background in the screenshot above. That’s a staple of the web back then: a sort of gray-blueish wrinkled paper, good for readability, but also moving boldly away from the solid colors of traditional user interfaces.
Throwing all the options on the screen in an apparent disorder was not a mistake. It was exactly the joyful experimentation found on the web. Look at the contrast between the Windows icons on the left and the colorful ones on the Partition Magic 4 interface. It was a wonderful time for graphical interaction, and it would only get bolder and more confident with the arrival of Windows XP.
Besides the web influences on the user interface, Partition Magic bundled more tools to make disk management easy. Creating a new partition added some automatic optimizations:

And here is the recommendations wizard showing what we could improve to make the system better and safer overall. Note how it offers to create the secondary partition once it detects we only have one. Just what we showed at the beginning of the article. Secondary partitions were becoming a thing and the recommended default:
Enough about partitions. Thank you for joining me on this short trip, and I hope the screenshots brought good memories back. For me, Partition Magic was the proof that disk layout was not static. That it could be edited and improved even after installing an operating system and tenths of other applications. It was a simple, small revelation. After that I soon started experimenting with dual booting operating systems, and other seemingly impossible computer experiments, of which we may talk about in the future. Until then, thanks for reading and see you next time!