Adding an external SSD to your Fedora Server on a Raspberry PI
So let’s recap: you decided to store your personal files in your home network instead of the cloud and you chose to build your own home server instead of buying an off the shelf NAS. You flashed the operating system to an SD card and booted your Raspberry PI and performed the initial configurations if needed. It was a bit of work but it was fun and you are ready for the next step. You are building a home server to share files after all, so what do you do now?
Adding the external drive
Powered down or while your Raspberry PI is running, you can simply plug in your external drive. Initially I had a 1TB Western Digital portable HDD and it worked great. It did enter sleep mode and it was noticeable though and when making bulk operations on large folders you could see the performance limits immediately. But I didnt’t fret because it was an older external HDD I had around and did not want to invest into something new.
After a while though, I wanted to step up the performance and I went for a Samsung T7 1TB SSD. The impact was as you would expect: nothing compares to an SSD. Bulk operations at 500 MB/s, transfers of over 100 MB/s and so on. Today I would only suggest buying SSDs but if you have an older portable HDD and don’t want to buy anything new or you just want to test a bit how a personal home server would work, keep it and use it. It’s a great starting option and since you already have it, it’s free.
Mounting the external drive
We will use Cockpit again because it became my favorite administration tool lately. So let’s access Cockpit in the web browser:
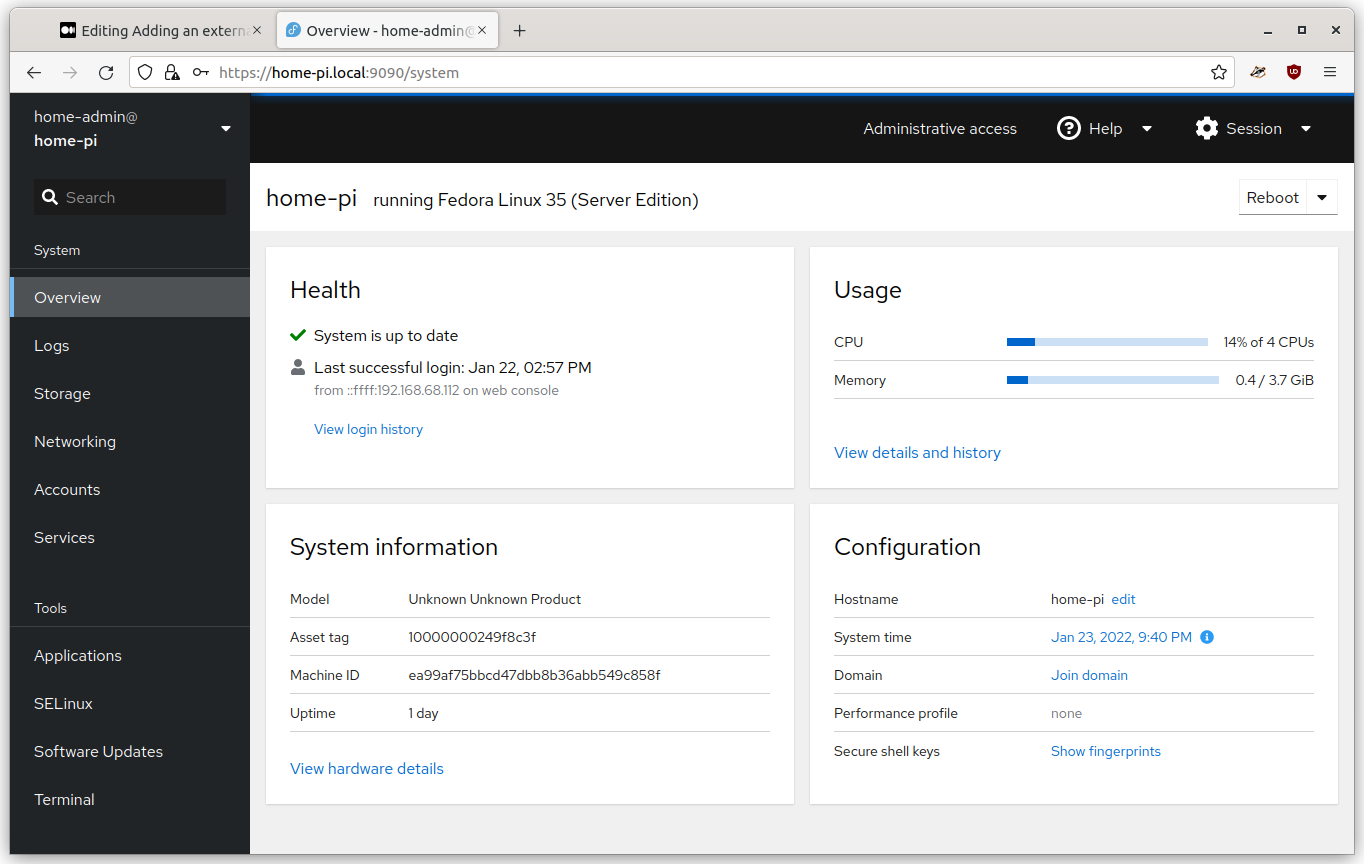
Go to storage management by selecting Storage in the left side bar:

Here you will see the existing filesystems in the main section. You can see here the root mount which is your SD card. It’s called fedora_fedora/root and you can see your SSD. It’s called dev/sda1. If you have an external HDD, it will probably be called dev/hda1. If it’s an NVME drive, it will be called something with nvm in its name. No matter the drive type, there will be a difference between what you will see and the screenshot above: your mount point will be empty. So let’s fix that.
Click on /dev/sda1 and click on Mount. You will need to provide a mount point: a location in your Fedora Server filesystem where this drive will be referenced. Mounts and filesystems are not an easy subject when talking about operating systems, but all you need to know is that all the files on your external drive will show up in this mount point. There is a special place in the Linux filesystem for mount points called /mnt so you should use that location and you should also add your own identifier. I chose mine storage. So the full path will be /mnt/storage. Make sure that your drive will mount on each boot by checking the “Mount on every boot” checkbox. By default it’s on so you should not have to worry about it. That’s it, your external drive is accessible to Fedora Server.
Creating some folders on the external drive
Now that the Raspberry PI and Fedora Server know about the external SSD, you can prepare some shares on that drive. Let’s create some folders there. Open a terminal and ssh into your home server:
#ssh your-server-user@your-server-ip
(enter password)
#cd /mnt/storage
#ls
The ls command will show if you have anything on your external drive. If it’s empty, it will show nothing. Let’s assume it’s empty. We will create the folders we want to share. I usually create three types of folders: one for each user in the home network to have some private files, one media folder for videos, photos and music and one shared folder for other files:
#mkdir radu
#mkdir media
#mkdir shared
Done. The three commands above will create the three folders we want to share. Now to actually share them.
Sharing the folders with NFS
There are many ways to share these folders over the network. If you have Windows systems in your network you have to share them using SMB. That’s the only way Windows will see them. It’s like a language Windows uses to understand sharing. If you have only Linux systems in your network you can share them using NFS: a language only Linux speaks but that gives a better performance for sharing between Linux devices. If you have a mixed network with Windows and Linux machines, you should use SMB. Linux understands SMB.
But for this article, we will assume that your network is made of Linux devices only so we will share the folders using NFS. To do that, we must edit the /etc/exports file and write there the folders we want to share like so:
/mnt/storage/radu      192.168.68.0/24(rw,all_squash,no_subtree_check,anonuid=1000,anongid=1000)
/mnt/storage/shared    192.168.68.0/24(rw,all_squash,no_subtree_check,anonuid=1000,anongid=1000)
/mnt/storage/media     192.168.68.0/24(rw,all_squash,no_subtree_check,anonuid=1000,anongid=1000)
Ok, there’s a lot to unpack from the above listing and I discuss NFS in a bit more detail in this article. The main point is that you can find all the folders you created here: radu, shared and media. You can also see an IP block which determines what devices in your network are able to access those shares. In this case it’s all of them: I will explain in a further article why. Next you have some NFS specific options in brackets: rw means the share is readable and writable, all_squash combined with anonuid and anongid means we don’t care about the Linux rights for these files so we can transfer them to the Fedora Server user we created when we installed Fedora Server on the Raspberry PI. NFS is not a walk in the park and I won’t describe it here. For now, the above /etc/exports will allow you to share the folders from your external drive with anybody in your home network.
To begin sharing we execute at the ssh terminal:
#sudo systemctl enable nfs-server
#sudo systemctl start nfs-server
Broadcasting the shares in the home network
Finally, the puzzle is almost complete: we have the drive, we have the folders to share, we are exporting them with NFS to the entire network: what’s missing? Technically speaking, nothing. Our network devices are ready to use the provided shares. The only problem is that you have to actually configure them to do so. They don’t know what these shares are and they don’t know who to ask for them. So what do we do now to improve this? We broadcast them to the home network using a network auto configuration service called Avahi. Let’s go.
So we are still on the Raspberry PI Fedora Server ssh session and we install avahi:
#sudo dnf install nss-mdns avahiNow that avahi is installed we must tell it what to broadcast. We do that by creating .service files in /etc/avahi/services. A service file looks like this:
<service-group>
  <name replace-wildcards="yes">Radu's home</name>
  <service>
    <type>_nfs._tcp</type>
    <port>2049</port>
    <txt-record>path=/mnt/storage/radu</txt-record>
  </service>
</service-group>
Easy. We create three files like the one above, called radu.nfs.service, media.nfs.service and shares.nfs.service in the /etc/avahi/services folder. Done. Now we quickly run at any computer in our home network and we quickly start the Files application or Dolphin or whatever you use: you will see in the special Network Locations area all your new shares. Brilliant!
If you don’t, your client is missing the avahi package so go ahead and install it from a terminal:
#sudo dnf install avahi gvfs-nfs nss-mdnsA long and technical article indeed. But by now you should have fully working and advertised shares for your whole network to see. We should talk a bit about security at this point but this article is already too long for that so I will save it for another time. Until then and now that your shares are working, it’s time to reclaim everything from the cloud and store it safely in your private and personal home network. It will take a while but it will be worth it! See you next time!